

 English
 русский
 Français
 Español
 عربى

Autoclaves for Pilot Batches: Cleanroom Design, Sizing, and Validation
A pilot batch is the point where a formulation stops being a document and starts producing something you can test, file and eventually scale. The autoclave usually becomes the first piece of equipment that has to prove itself, because a pilot plant cannot move forward until its sterilization cycle is reproducible, load after load. Specifying autoclaves for pilot batches is therefore less about buying a vessel that reaches 121 degrees Celsius and more about designing a sterilization step that will still make sense when the process moves to commercial scale.
We build cleanroom envelopes for pharmaceutical, medical, food and semiconductor clients, and pilot suites are almost always the most complicated rooms on the drawing board. Equipment arrives before the layout is frozen. Loads change every week. Validation paperwork starts before the walls are finished. This guide covers the decisions that genuinely shape a pilot-scale autoclave project, from chamber sizing and cycle development through to the panels, doors and transfer equipment that surround the vessel.
Why Pilot-Batch Autoclaves Are Not Small Production Autoclaves
A production sterilizer is bought to repeat one validated cycle thousands of times. A pilot-batch autoclave is bought to answer questions. Does this medium survive the hold time. Does this filter assembly stay intact. Does this packaging actually let steam reach the cold spot. Those two jobs pull the specification in different directions, and the difference shows up long before anyone writes a purchase order.
Pilot units usually need more data channels, more flexible recipe management and a wider operating band for vacuum and pressure. They also tend to be installed in rooms that were designed for something else, which is exactly why the cleanroom envelope around the vessel deserves attention early rather than at the end of the project.
| Consideration | Pilot-batch autoclave | Production autoclave |
|---|---|---|
| Chamber volume | Often 50 to 500 litres | Frequently 1,000 litres and above |
| Load variety | Many different load families each month | A small number of fixed, validated loads |
| Cycle frequency | A few cycles per day or per week | Continuous shifts, high utilization |
| Control philosophy | Flexible recipes with heavy data logging | Locked programs with audit trails |
| Validation focus | Cycle development, load mapping, repeat studies | Routine monitoring and periodic requalification |
| Room relationship | Often retrofitted into a multi-purpose suite | Purpose-built chamber with dedicated utilities |
The practical takeaway is that a pilot autoclave should be specified around flexibility and documentation, not around the lowest possible cycle time. Throughput matters much less at this stage than the ability to demonstrate that every load you intend to run has actually been sterilized.
Choosing the Right Autoclave Type for Pilot Work
There is no single correct configuration for pilot-scale sterilization. The right choice depends on where the load comes from, where it goes after the cycle, and how the room is pressurized. Three configurations cover the majority of pilot projects.
Horizontal Double-Door Pass-Through Units
A double-door unit mounted through a wall separates the dirty side from the clean side, so materials enter from a preparation or wash area and exit directly into the sterile core. For pilot batches this is usually the most elegant arrangement, because it removes a manual transfer step and reduces the risk of recontamination. It does require the room layout to be decided early, since the wall penetration, the door swing and the differential pressure between the two rooms all have to be coordinated before panels are ordered.
Vertical and Benchtop Sterilizers
Vertical top-loading and benchtop units suit laboratories where floor space is tight and loads are small, such as glassware, small instruments and sample containers. They are simpler to install and easier to relocate when a pilot suite is reconfigured. The trade-offs are ergonomic. Lifting a heavy basket out of a hot chamber is a real safety issue, and the surrounding room still has to handle the heat, humidity and condensate that the unit releases during exhaust.
Matching the Load to the Cycle
Before selecting hardware, list every load family the pilot plant expects to run. A realistic list for an early-phase facility usually includes the following.
- Aqueous solutions and media in capped bottles, which need slow exhaust and controlled post-cycle cooling to avoid boil-over.
- Glassware, instruments and small metal parts in wrapped trays, which depend on effective air removal and a reliable drying stage.
- Filters, tubing and single-use assemblies, which call for gentle vacuum rates so that fragile components are not damaged.
- Waste and contaminated solids in autoclave bags, which need load sensing and a safe exhaust path.
- Gowns, wipes and other porous goods, which are the classic hardest load for steam penetration and the usual worst case for validation.
Chamber Sizing and Load Mapping for Pilot Batches
Sizing starts from the worst-case load, not the average one. Measure the largest and densest combination of items you expect to sterilize in a single run, add the basket or rack, and then allow roughly ten to fifteen percent headroom. That headroom is not wasted space. It is what allows steam to circulate around the load and what keeps you from discovering, six months after installation, that your main product load no longer fits.
The shape of the chamber matters as much as its volume. A long, shallow chamber suits trays of bottles and long tubing assemblies, while a taller chamber suits stacked baskets. Drain position, shelf spacing and door clearance all influence how quickly operators can load and unload the vessel, and in a pilot suite that labor is a real part of the daily schedule.
| Load family | Typical packaging | Cycle priority |
|---|---|---|
| Aqueous media | Capped bottles, 250 to 1,000 millilitres | Slow exhaust and controlled cooling |
| Glassware and instruments | Wrapped trays and pouches | Air removal and drying |
| Filters and tubing | Sealed bags or connected assemblies | Gentle vacuum, no aggressive drying |
| Contaminated waste | Autoclave bags in a secondary container | Load sensing and safe exhaust |
| Porous goods | Gowns, wipes, textiles | Deep vacuum and long steam exposure |
Once the load list and the chamber size are agreed, the layout of the room around the vessel can be drafted. This is the point where equipment selection and cleanroom construction have to be decided together, because a change in chamber size will move doors, drains and ductwork.
Cycle Development and Validation Checklist
Cycle development for a pilot autoclave follows a predictable sequence. Skipping a step tends to surface later as an expensive deviation during a technology transfer.
- Define the load families and agree which one represents the worst case for steam penetration.
- Set acceptance criteria for each load, including sterility assurance level, temperature range and maximum hold time for heat-sensitive solutions.
- Map the load with calibrated thermocouples placed at the cold spot and at representative positions around the chamber.
- Develop the cycle by adjusting air removal, heat-up, exposure and drying stages until every probe meets the criteria.
- Repeat the cycle at least three consecutive times to demonstrate consistency, then document the results in a development report.
- Plan the scale-up route early, so that the parameters proven at pilot scale can be transferred to production equipment with a clear rationale.
Two technical details are worth planning for from the beginning. First, if the process uses an F0 approach, the control system needs to calculate and record it automatically rather than relying on a post-run spreadsheet. Second, biological indicators and chemical indicators should be part of the routine, not an afterthought, because they give reviewers an independent confirmation that the physical measurements mean what they claim to mean.
The Cleanroom Envelope Around the Autoclave
The sterilizer is only half of the project. The room around it has to manage heat, humidity, condensate, steam leaks and the constant movement of materials in and out. In pilot suites, where the same room often serves several process steps, that envelope is what determines whether the facility stays usable and easy to clean.
Panels and Finishes
Walk into a sterilization room that has been in service for a few years and you will usually see the same problems. Swollen panel joints, discoloured sealant, and a ceiling that has lost its finish above the door. A dense mineral core panel holds its shape far better than a lightweight foam core in a room that swings between hot and humid and cool and dry every day. Smooth, non-porous surfaces and properly sealed joints also make routine disinfection practical instead of painful.
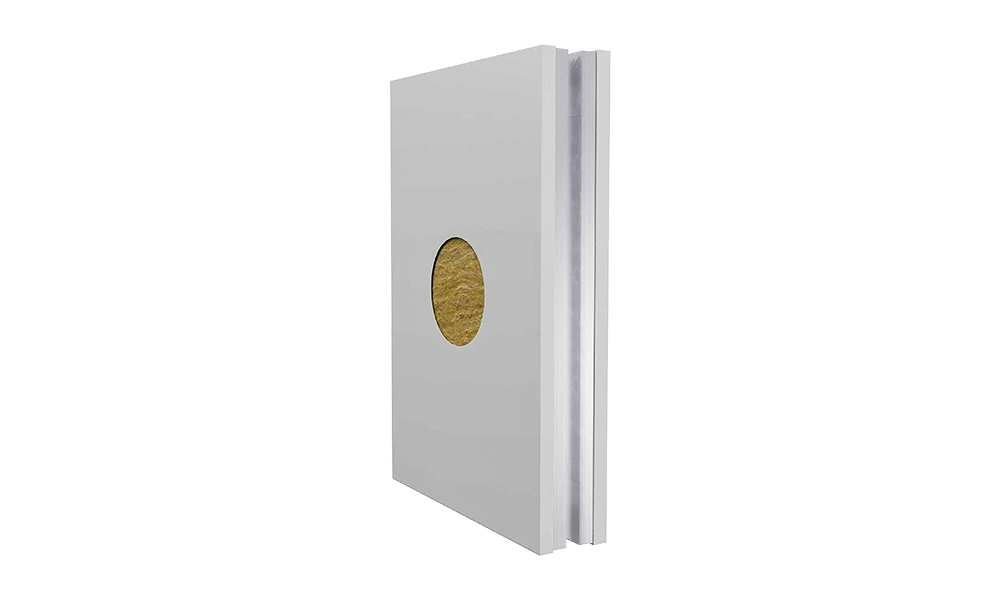 Rockwool Cleanroom Panel for Sterilization Room InteriorsWith rockwool infill and cleanable surface options such as SS304 or HPL, this panel suits cleanroom walls and ceilings in humid sterilization rooms.View Product →
Doors, Gaskets and Hardware
Door hardware takes more punishment in a sterilization room than almost anywhere else in a cleanroom. Operators move quickly, trolleys bump frames, and moisture sits on surfaces between cycles. Stainless steel doors with robust gaskets and easily replaced seals hold up well, and they keep the surface cleanable without special treatment. Where a room must maintain a pressure cascade, the door and its closer have to be selected together so that the opening force stays manageable for staff.
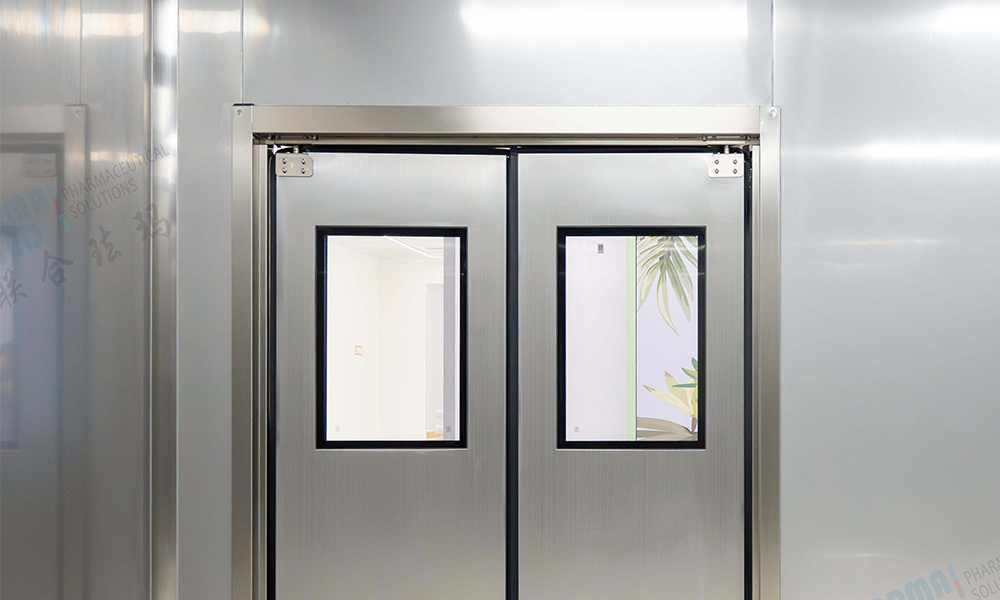 Cleanroom Stainless Steel Door for Sterilization RoomsMade of stainless steel sheet, this door resists corrosion, impact, and moisture while supporting frequent cleaning in pharmaceutical, laboratory, and hospital cleanrooms.View Product →
Transfer Points and Material Flow
Every time a door opens between a preparation area and a sterile core, the pressure relationship in the suite is disturbed. A pass-through transfer point solves that problem by letting materials cross the boundary without breaking the separation between rooms. In pilot facilities, this small piece of equipment is often what makes a two-room layout workable, especially when the autoclave itself is not installed as a wall-mounted pass-through unit.
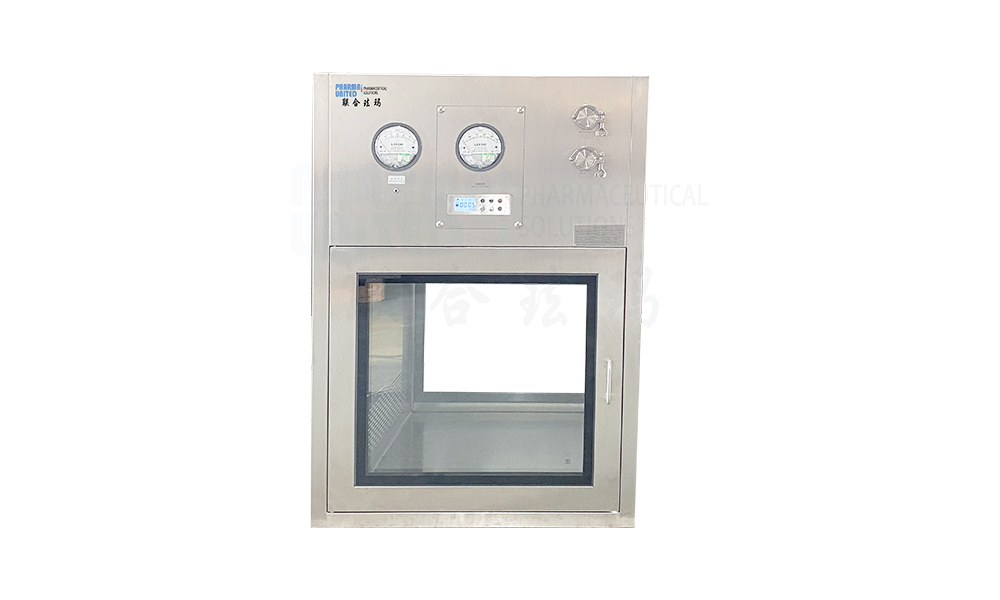 SS304 Pass Box for Cleanroom Material TransferFor two-room cleanroom layouts, this SS304 pass box transfers materials while reducing door openings, air exchange, and cross-contamination risk.View Product →
Utilities, Heat Load and Layout Planning
Sterilizers are heavy utility consumers, and their demand is concentrated into short bursts that are easy to underestimate on a planning drawing. Laying out the room without accounting for that profile is one of the most common reasons a pilot suite underperforms after commissioning.
| Factor | What to plan for |
|---|---|
| Steam supply | Quality of steam, capacity at peak demand, and condensate removal |
| Cooling water | Flow rate for jacket cooling and a drain that can handle the volume |
| Compressed air | Clean, dry air for valves, door seals and pneumatic controls |
| Room exhaust | Removal of heat and humidity released during unloading |
| Electrical and controls | Dedicated supply, data logging and a clear route for sensor cables |
| Service access | Space behind the unit for maintenance without entering the clean zone |
Drainage deserves special attention. Condensate from a large chamber arrives quickly, and a floor drain that was sized for hand washing will not keep up. Sloping the floor towards a properly trapped drain, and keeping that drain outside the critical clean zone where possible, avoids standing water and the biofilms that follow it.
Common Mistakes When Specifying Autoclaves for Pilot Batches
Most pilot autoclave projects that run into trouble do so for predictable reasons. These are the ones we see most often.
- Buying on chamber volume alone, without checking that the worst-case load physically fits with room for steam circulation.
- Leaving cleanroom construction decisions until after the equipment is ordered, then discovering the wall penetration will not work.
- Ignoring the humidity that a single cycle releases into a small room, which then pushes the HVAC system beyond its design capacity.
- Sizing drains and steam supply from an average rather than a peak demand.
- Treating cycle development as a task for later, which delays the first engineering batch and pushes validation into a corner.
- Forgetting that pilot teams change loads constantly, and specifying a control system that only supports a handful of fixed recipes.
Planning the Autoclave and the Room as One System
The cleanest pilot projects are the ones where the sterilizer and the room are designed in the same conversation. Chamber dimensions, door positions, panel thickness, drain location, exhaust capacity and pressure cascade all interact, and each one can quietly invalidate the others if it is decided in isolation. Bringing the equipment supplier and the cleanroom contractor to the same table early costs very little and saves a great deal of rework.
If you would prefer not to coordinate several vendors across a single pilot suite, our cleanroom turnkey solution covers design, panel and door manufacturing, and on-site installation as one scope. For facilities that must satisfy pharmaceutical reviewers, our pharmaceutical cleanroom solutions page sets out how the envelope, the pressure regime and the documentation are brought together. If you have a load list and a floor plan, we are happy to look at both and tell you honestly where the risks are.
Frequently Asked Questions
How large should an autoclave be for a pilot batch?
Size from the worst-case load rather than the typical one, then add ten to fifteen percent for steam circulation. In practice, most pilot facilities settle somewhere between 50 and 500 litres. If the load list is still changing, choose a larger chamber with flexible shelving rather than a tight chamber that fits today's process.
Can a benchtop autoclave be used inside a cleanroom?
Yes, provided the surrounding room handles the heat, humidity and condensate the unit releases. Benchtop units are common in laboratories and small pilot suites because of their small footprint. The main constraints are ergonomics, drainage and local exhaust, not the classification of the room itself.
What cleanroom classification does a sterilization room need?
The classification depends on what the load is and where it goes afterwards. A preparation area that feeds a sterile core is often designed as a controlled but lower-grade space, with the higher classification held on the clean side of the pass-through. The pressure cascade between these zones matters more than a single headline grade.
How long does cycle development take?
For a straightforward liquid or instrument load, a development and repeat study can often be completed in a few weeks once the equipment is installed and calibrated. Complex porous loads, or processes with tight temperature limits for heat-sensitive solutions, usually take longer because the cold spot has to be found and held within a narrow band.
Do I need a double-door autoclave for pilot work?
Not always, but it is usually worth considering. A double-door unit mounted through a wall allows materials to cross from the preparation side to the clean side without an open corridor transfer, which simplifies the pressure regime and reduces recontamination risk. Where the layout does not allow a wall penetration, a pass-through transfer point is a practical alternative.
What should I prepare before contacting a supplier?
Two things make the first conversation far more productive: a realistic load list with container types and sizes, and a rough floor plan showing where the unit will sit and where materials come from and go to. With those two documents, chamber sizing, door placement and utility requirements can be discussed concretely instead of in general terms.


-
Mobile
+86-177 1554 8238
-
E-mail
chin@pharma-united.com
-
Address
No.58 Beiyuan Road, Dianshanhu Town, Kunshan City, Jiangsu Province, China
Copyright © Pharma United Co., Ltd. Rights Reserved.
OEM/ODM Cleanroom Engineering Solution Manufacturers
